Help › Add a server connection
Add a server connection
IPTinCan can hold more than one server. If a friend or family member runs their own and sends you an invite, here's how to connect to it from the desktop app — in three quick steps.
You'll need an invite first. Servers are invite-only — there's no public sign-up. Ask that server's admin to send you an invite link (starts with
ipt://) or an invite code (starts with ITC-) from their app under Admin → Invites.
1
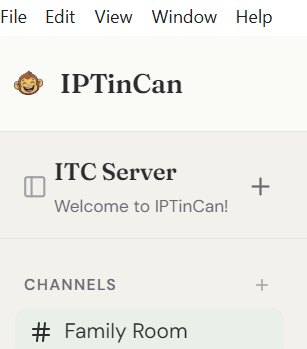
Open the server list
By default the server list is tucked away to keep things roomy. Click the panel icon at the top-left of the channel list — just to the left of your server's name.
2
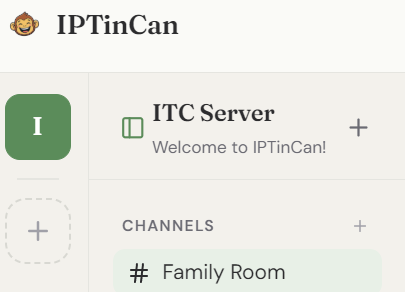
Click the “+” to add a server
The server rail slides in on the far left, showing your servers as icons. Click the dashed “+” tile below them — that's Add a server.
3
Paste your invite and Join
A small Add a server dialog opens. Paste the invite link or code your admin sent you and click Join. You'll see a brief “connecting” screen and land on the new server.
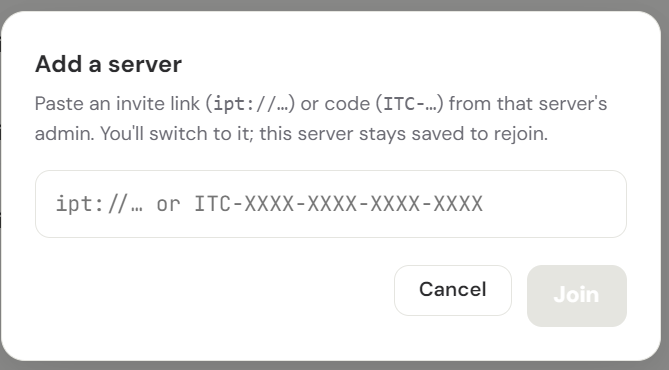
Tip: if you copied the invite already, you can just paste it straight into the field.
Switching, not signing out. IPTinCan connects to one server at a time today, so joining a new one switches you over — but your current server stays saved. To hop back, open the server list and pick it (or use the connect screen's Recent list).
Trouble?
- “Couldn't read that invite.” The text isn't a valid invite — make sure you pasted the whole
ipt://link or the fullITC-XXXX-XXXX-XXXX-XXXXcode, with nothing extra. - “The server rejected this invite.” The invite expired or was already used — ask the admin for a fresh one.
- “Could not reach the server.” The server may be offline or the address is wrong. Check status.iptincan.com, or ask the admin.
- Still stuck? The support assistant can help, or email support@iptincan.com.